Step-by-Step Guide to Configure EC2 Instance on AWS.

Configuring an EC2 (Elastic Compute Cloud) instance on AWS (Amazon Web Services) involves several steps. Here's a quick user guide to get you started:
Sign in to AWS Console: Log in to your AWS account at https://aws.amazon.com/console/.

Navigate to EC2 Dashboard: Once logged in, go to the EC2 dashboard. You can find it under the "Compute" section.


Launch Instance: Click on the "Launch Instance" button to create a new EC2 instance.


Choose AMI (Amazon Machine Image): Select an Amazon Machine Image (AMI) that best suits your requirements. AMIs are pre-configured templates for your virtual server (EC2 instance). You can choose from AWS's pre-built AMIs or use your own custom AMI.

Choose Instance Type: Select the instance type based on your workload needs. Instance types vary in terms of CPU, memory, storage, and network capacity. Choose one that matches your requirements.

Configure Instance Details: Specify configuration details such as the number of instances, network settings, subnet, IAM role (if applicable), etc.

Add Storage: Define the storage requirements for your instance. You can attach additional EBS (Elastic Block Store) volumes if needed. Configure the size and type (SSD/HDD) of the storage.

Add Tags: Optionally, add tags to your instance for easier identification and management. Tags are key-value pairs that help organize your AWS resources.
Configure Security Group: Define the security group for your instance. A security group acts as a virtual firewall to control inbound and outbound traffic to your instance. Configure rules to allow access only to necessary ports and protocols.

Review and Launch: Review your instance configuration and make any necessary adjustments. Once you're satisfied, click on "Launch."
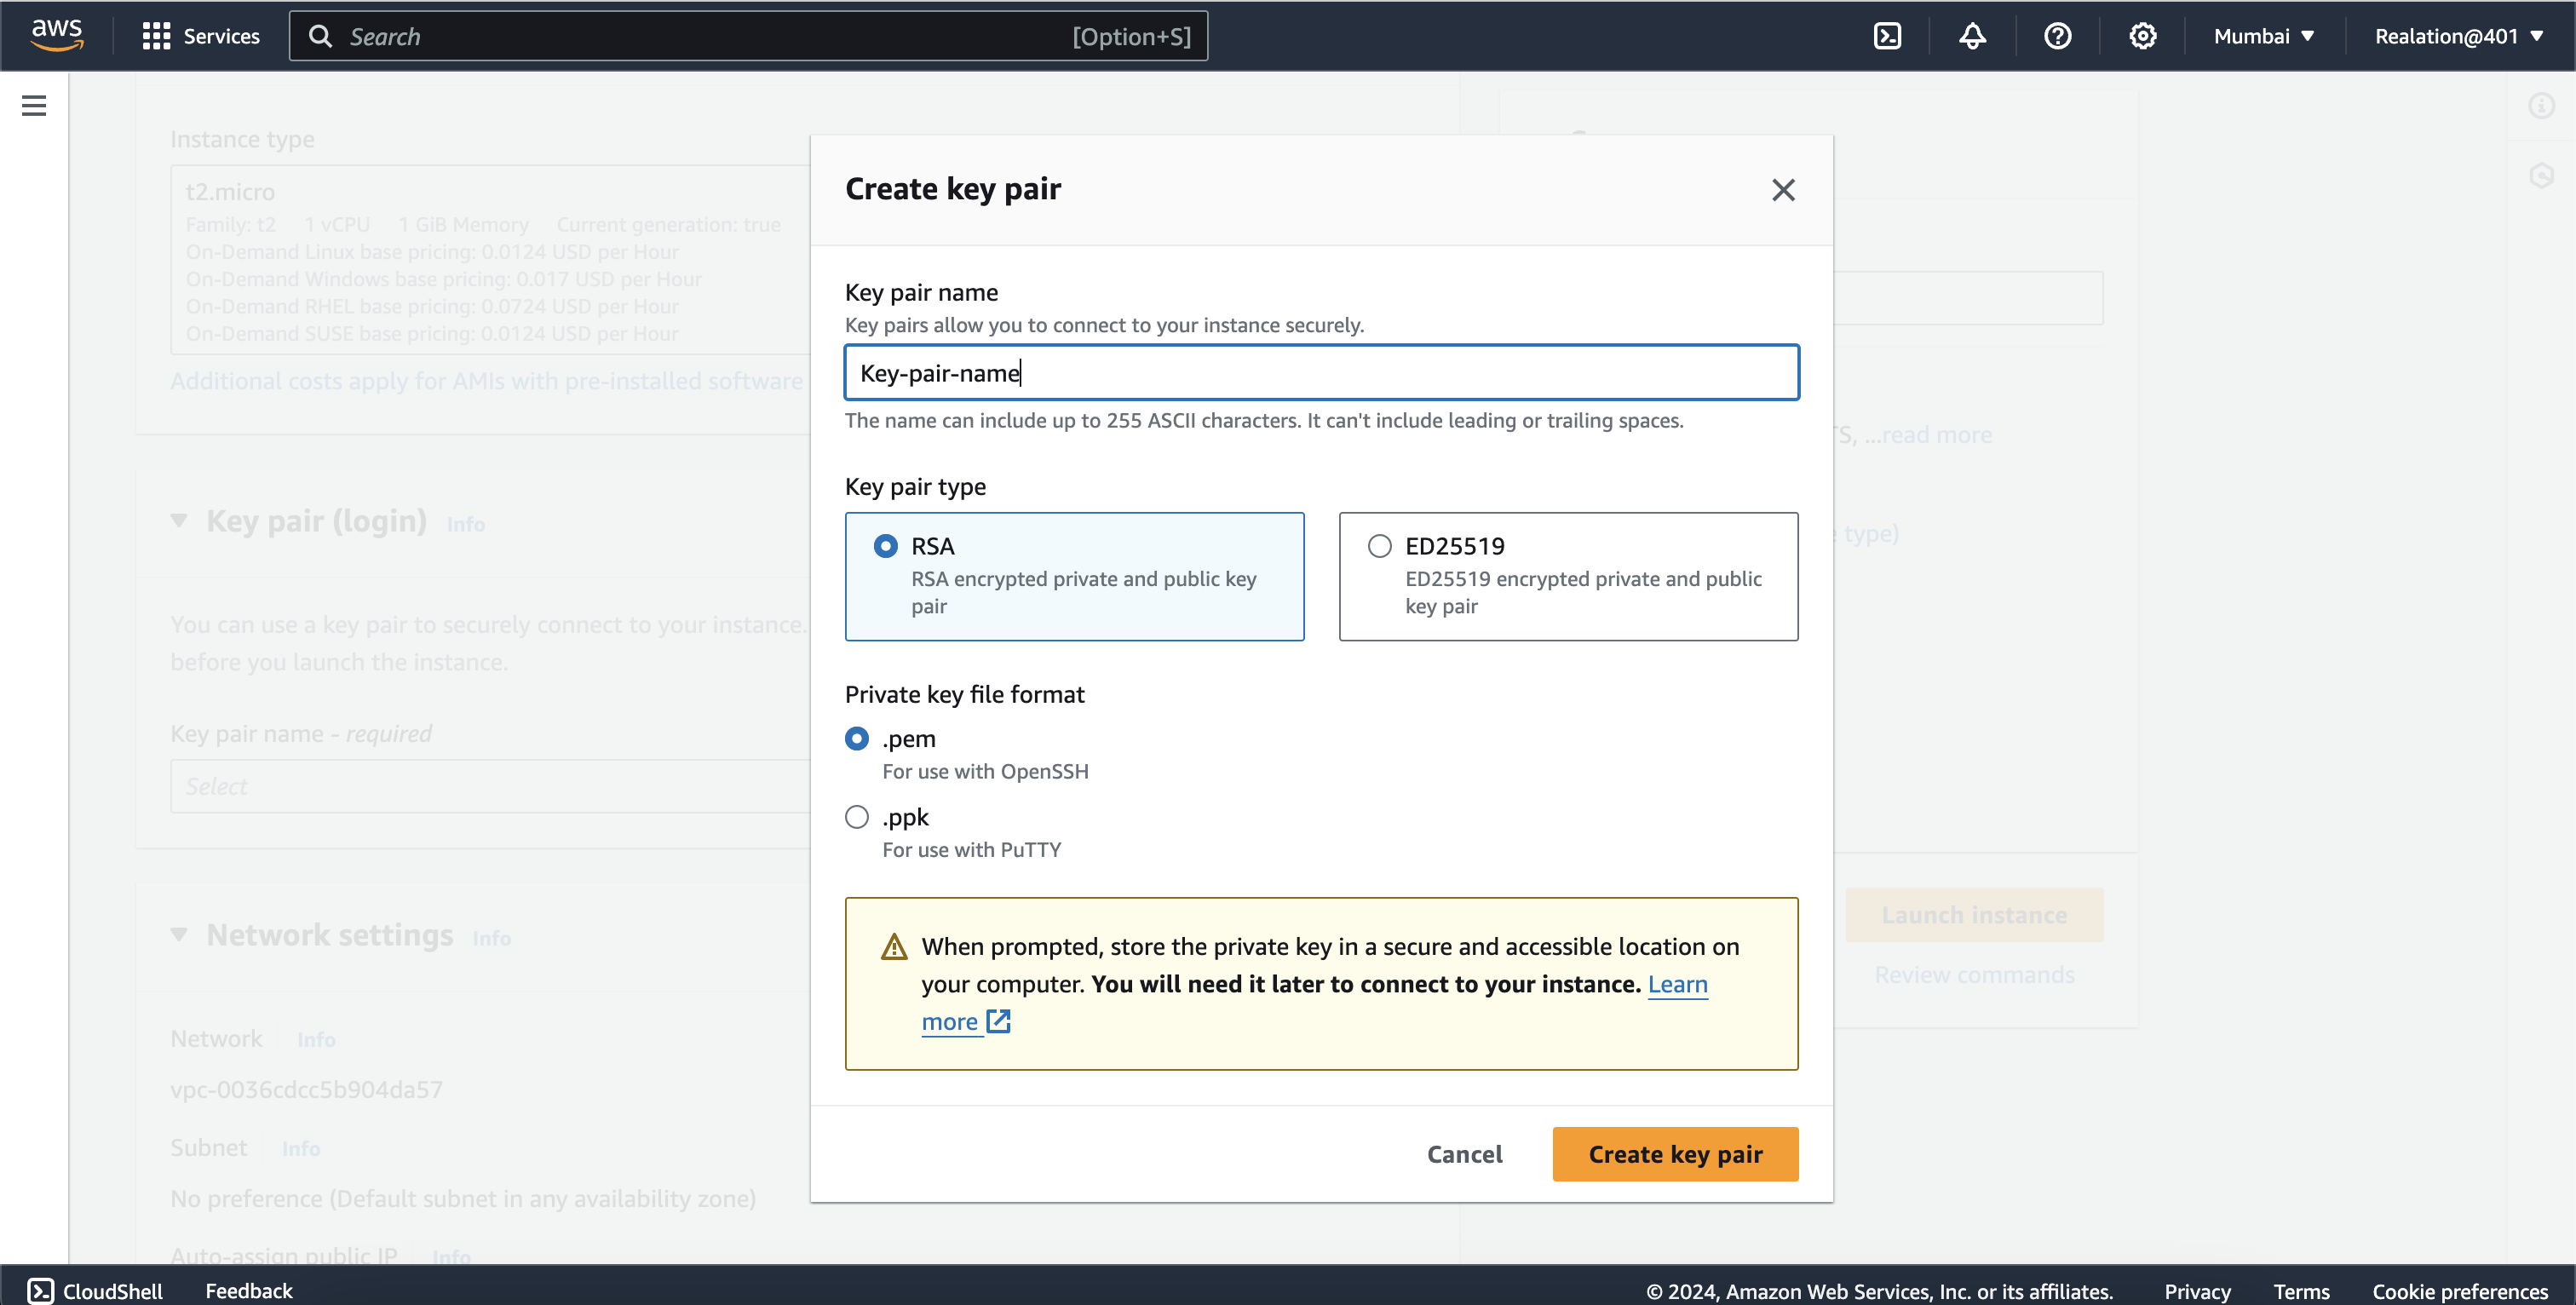
Create Key Pair: If you haven't already, you'll be prompted to create or select an existing key pair. This key pair is necessary to SSH into your EC2 instance securely.
Launch Instance: After selecting or creating a key pair, click on "Launch Instances." This will initiate the provisioning of your EC2 instance.

Accessing the Instance: Once the instance is launched, you can access it via SSH (for Linux instances) or RDP (for Windows instances) using the key pair you specified during launch.

Configure the Instance: Log in to your instance and configure it according to your requirements. This may include installing software, setting up a web server, configuring databases, etc.

Monitor and Manage: Finally, monitor your instance's performance using AWS CloudWatch and manage it as needed through the EC2 dashboard.

That's a basic guide to configuring an EC2 instance on AWS. Remember to terminate instances when you no longer need them to avoid unnecessary charges.